
I posted this natural barely-there makeup look on Twitter + my Instagram story yesterday and a lot of you were asking what products I used. I figured I'd go ahead and make a post to get myself back into the blogging game—something I've been wanting to do for a while—and teach you guys the super easy steps I took to achieve this look while answering your question! I'd like to take the time before we begin though, to let you know that you don't need to use the exact same products as I did, from the exact same brands. These are just what works for me, and what I really really like enough to invest in, but you can switch them up and play around with it (I've used contour powder as eyeshadow, so, you know...). Whatever works for you will do!
But just in case you want to try them out, I've also added mini reviews below. Let's get started!
STEP 01: FOUNDATION

In all honesty, this look started with Step 0: Skincare, which involved face wash, toner, moisturizer, and SPF. Primer, if I don't forget (which I did that day). But once you have all that sorted out, you can move to the first step which is to apply your foundation! I use NARS Sheer Glow in Punjab (Rustan's, Adora), which I pump on the back of my left hand, and then a makeup sponge from BYS Cosmetics (it's everywhere!! I got mine in SM Makati though) to apply it all over my face and jaw.
I'm a NARS girl, so I have nothing but praises for this foundation. It's light to medium coverage (is that the right term?), which is perfect since I'm not really fond of thick foundation or the popular 'baddie' look (not that it's terrible; I just wouldn't pull it off and I always want to lie down so the thought of getting that much makeup on a pillow would stress me out). When I'm not using my tinted moisturizer, this is definitely my go-to. It gives off a natural, dewy look—matte, but not too matte that it looks dry and powdery and cakey, and I'm all about it.
STEP 02: CONCEALER

I use both the Glossier Stretch Concealer in Medium (Glossier.com) and NARS Radiant Creamy Concealer in Custard (which I gifted to my mom and 'borrowed' lol) to cover the circles under my eyes and any other discolorations or spots on my face that might be there. I also apply concealer on my eyelids (usually I use Essence's I Love Stage Eyeshadow Base but I just used NARS for this look) as an eyeshadow base. It makes the eyeshadow more pigmented! I tap the product in lightly with my fingers or a makeup sponge so it blends well, because I used to use a brush to apply concealer and that just wasted so much product and made it look bad. Ugh. *shivers*
I really like Glossier's Stretch Concealer, and the packaging is pretty (and heavy enough to feel luxurious, I'll admit), but sometimes I wish it didn't have to come in a pot. I wash my hands before I do my makeup, but I still feel a little weird having to stick my finger in there. I feel like it just gets dirtier and dirtier, but that can easily be fixed with a spray bottle and isopropyl alcohol, which I learned from you guys on Twitter!
As for the NARS concealer, it's one of their bestsellers so you know it's good. And it is. Just like the Glossier concealer, it's buildable and gives great coverage. There's not much more I could ask for, but it is my mom's so this item is more of a guest in my makeup bag than a mainstay.
STEP 03: EYESHADOW
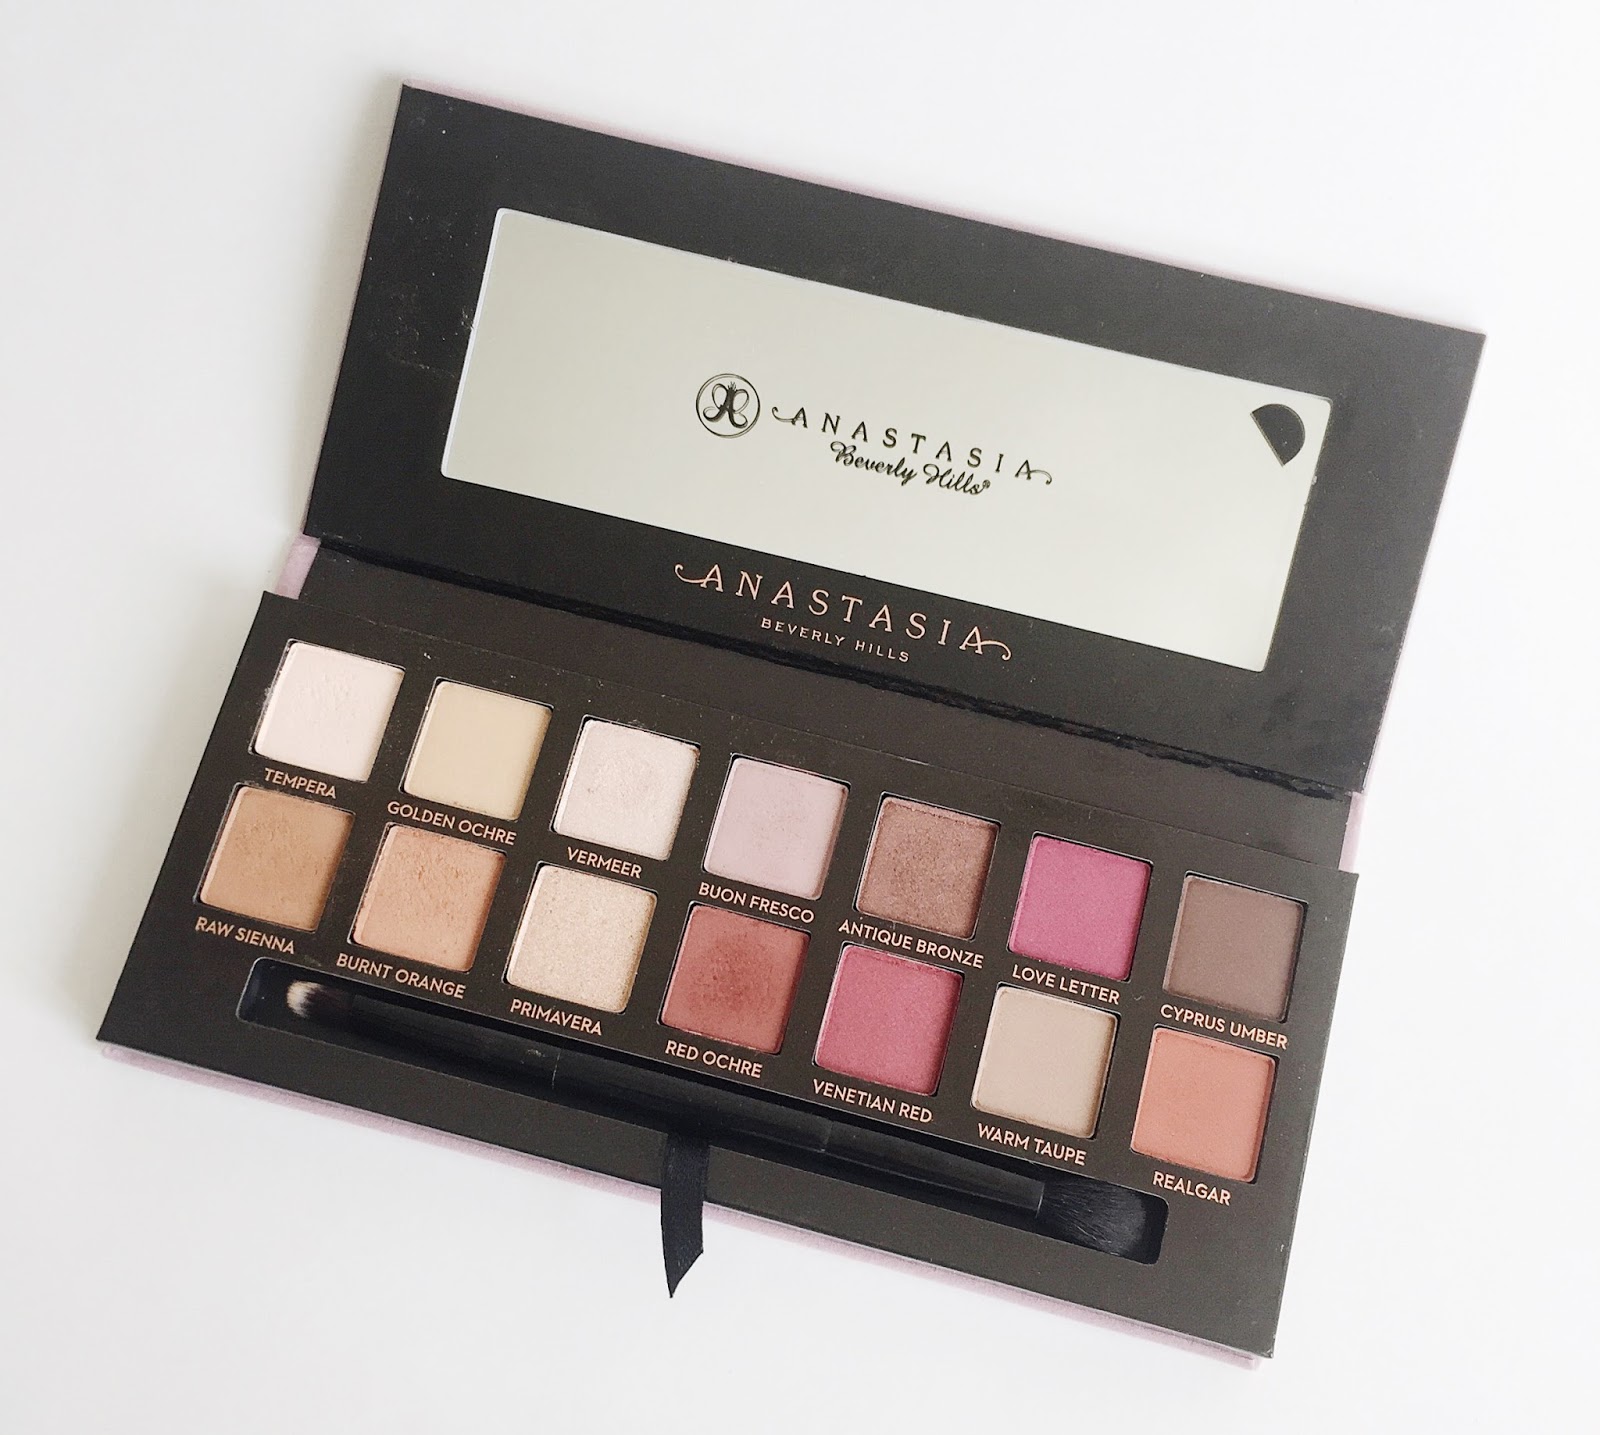
Anastasia Beverly Hills' Modern Renaissance Palette (Sephora US—currently not available in the PH) is my holy grail. The formula is great, though they're so soft and creamy the pressed powder messes up quickly (as you can see in the pictures), and I'm afraid of getting the packaging dirty so I have to keep it in the box all the time.
The colors are bolder than what a makeup rookie like me should be experimenting with, but if I'm sticking to my new blog name and going against convention, why not, right? Ate Elisa wrote a lengthier review on this palette and why it's worth the splurge, and I highly highly recommend you read that because as much as she loves the palette, she stays rational and informative, whereas if I even attempted to do a review, I'd just end up flailing and screaming, "YES YES YES!" So, just to put it out there, if you want to get this palette, do check out her review first as it might help you make up your mind. Urban Decay Naked Heat is also a similar alternative, just in case you're wondering.

But back to the tutorial. I used the shade Burnt Orange (pictured above) and dabbed it lightly over my lids, just below the crease with a brush (I'm not sure what its type is—I think it's a blending brush—but for your reference it's the MAC 224SE that I inherited from my mom) and then blended it well. I didn't have to use much product because it was so pigmented. After that, I applied the shade Tempera (pictured above) onto the inner corners of my eyes.
STEP 04: EYELINER

I've developed a love/hate relationship with my Shiseido Automatic Fine Eyeliner in Brown (EDSA Shangri-La Mall and other Philippine Shiseido branches). It was an impulsive splurge (I like to call it an 'investment') and I didn't read much reviews before purchasing because I'd been on the hunt for weeks for an eyeliner, but all the ones I've tried, I wasn't too pleased with how they felt. Granted, I was just getting back into the hang of using an eyeliner so that might be more of my fault, but then I tried this and it's just so easy to use that I fell in love. I figured I wouldn't die if I bought something without reading the reviews anyway.
So why do I love this? It's easy to apply; when I first got it, the color was perfect—it wasn't too strong like the typical black eyeliner which made my eyes pop out too much. This was subtle, it made my eyes look bigger but as if they were that way naturally. Plus, the little button at the end that you press is also fun. It's a novelty I appreciate, alright?
But why do I hate it? It's gotten so watery since then that the pigment barely shows. I visited their branch in Greenbelt and asked them why that was happening, and apparently I just have to shake it more. Seriously. Okay. I haven't tried it yet but if it gets better then I'll let you know.
But going back to the tutorial, I don't do anything fancy with my eyeliner. I just line as close to my lash line as possible and leave it at that.
P.S. If you're looking for an alternative, Blinc has super amazing eyeliners that are now available in Beauty Bar.
STEP 04: MASCARA

Usually, I use Fashion21 Double Up Mascara (SM Beauty) but after a mishap with my mom where a recently-discovered expired one, buried under piles and piles of her old makeup, got confused with my new one, I had to look for a new alternative so as not to risk irritating my eyes or getting an infection. In any case, I still recommend that mascara as it was my favorite (and hella affordable to boot) up until I discovered L'Oreal False Lash Superstar (SM Beauty, Zalora). I still have the video of me testing it out at the department store, uncurled lashes and all, gasping at how much longer my lashes got because of this.


It's a 2-step mascara that starts with the white primer (I'm assuming; I didn't read the instructions lol), so I put that on first. Afterwards, I move on to the actual mascara and just apply it to my lashes, but not too much so that they don't look like spider legs or too dramatic. I was really going for a simple, natural look, but this is also perfect for bolder, more dramatic looks.
I'll be honest though, I got this because Lash Paradise, also by L'Oreal, was not available.
STEP 05: EYEBROWS

I use three products for my sorry excuse for eyebrows (I need to get 'em fixed, fast). First, I apply Glossier Boy Brow in Brown with strokes that go against the natural direction my brows grow in to make sure all the tiny hairs are caught, then with the direction to put them in place. I'm sure most of everyone has heard about the Boy Brow, which is Glossier's bestseller (for good reason). I'm such a big Glossier girl, but I never cared about my products until I started using this. No lie. It's made doing your eyebrows so fun and fuss-free.


Afterwards, I fill it in with the NARS Brow Perfector in Caucase with light thin strokes. I love the color and so far it's been good, but I haven't used it long enough to really give an informed opinion on it. I used to use The Face Shop Designing Eyebrow Pencil in Brown (All The Face Shop Philippine branches) but the shade was a little too brown, so now I just use the spoolie it comes with to blend and brush my brows at the end.
STEP 06 & 07: CONTOUR & BLUSH

Growing up, I spent countless hours in the Benefit counters both locally and abroad, simply because my mom was obsessed with their products. I'm serious when I say hours. Little 'ole me, unappreciative and uninformed of the wonders of makeup, would be sour-faced in Sephora, thinking about the toys I wanted to get, while my mother was attended to by multiple Benefit ladies suggesting products and helping her try it. In fact, when I first started using makeup, my mom handed me down the ones she still had and barely used, and I learned from there.
For this look, I used Benefit Hoola and Dandelion from the Cheek Parade set (limited stocks left in local Benefit branches, Sephora PH) as contour and blush respectively. I haven't used the other products in the set so I can't give a full-on review, but all I can say is: there's a reason Hoola is one of the most popular bronzers in the US, and Dandelion complements it so well. I'd been using Glossier Cloud Paint as my lone brush prior to having the Cheek Parade set, and I love that just as well, but man. This just works so well for me.


My only complaint about this set would have to be the packaging. The word 'Parade' is a sticker, made to cover up a branding mistake, and then the 'Galifornia' wasn't package well since it protrudes and hits the mirror. But otherwise it's perfect.
So I just apply the bronzer to the high points of my forehead, my cheeks, and my jaw, to give my face more definition and color. I don't contour my nose since I think it makes me look weird.
For the blush, I swirl it on the apples of my cheeks.
STEP 08: HIGHLIGHT


Glossier Haloscope in Quartz is the Best. Highlighter. Ever. It's not glittery or shimmery like most that I've tried; it has crystals in it and it's creamy so it literally makes you glow. I love how dewy and easy to blend it is, and just—man. I love this so much. I have no words.
I glide this on the high points of my cheeks, a little upwards to the side of my eye like half a halo (wink wink), the bridge of my nose, at the end of my philtrum above my top lip, and a little on my chin. I blended it using the BYS Makeup Sponge for this look, but usually I just use my hands.
STEP 09: LIPS

The ultimate My Lips But Better shade for me is NARS Pure Matte Lipstick in Tonkin. It's the best. It's matte, but it's not drying; it's super pigmented in that you only need one swipe to get the full color—all of that jazz. It's definitely worth the splurge, for reasons I hope to someday find enough words to talk about. But the first sentence of this paragraph is mainly my reason. I put this on whenever I want to go for a natural look, but if this were a night look, I'd have used the MAC Matte Lipstick in D For Danger.
STEP 10: SET

We've reached the end and another holy grail product: the Mario Badescu Facial Spray with Aloe, Herbs, and Rosewater! (Rustan's, Sephora PH) I love the scent of this and how it gives my face a refreshing feel after the process of applying makeup so I spritz this liberally on my face, let it dry, and voila: it's done!
Hopefully you learned a thing or two from me, and as always, if you have any questions, you know where to find me (or if you don't, my social media links are in the top bar navigation). This blog is still under construction, but I like to strike while the iron is hot, which means: do it before you get lazy.
If you have any suggestions for me, feel free to tweet me or send me an e-mail!
Love & light,
Nina
No comments